Views: 0 Author: Site Editor Publish Time: 2025-09-08 Origin: Site


You can put in and connect a limit switch by following each step. This helps your project work safely and well. Many new people have problems like wrong wiring or loose wires. These mistakes can make the switch not work. Sometimes, a dirty air filter or stuff in the blower fan can also cause trouble. Always use a multimeter to check if the switch works before you finish. If you are patient and careful, you can do this job even if you are new to electrical work.
Get all the tools and materials you need first. You will need screwdrivers, wire strippers, and a multimeter. This helps make the installation easy.
Pick the right limit switch for your project. Think about voltage, current, and the place where you will use it. This keeps things safe and working well.
Use safety rules when you work. Always wear safety gear. Turn off the power before you touch electrical parts. This stops accidents from happening.
Put the limit switch in a good spot. Make sure it is tight and does not move. Keep it away from things that block or shake it. This helps it work well.
Check your limit switch often. Look for loose wires and parts that are worn out. This stops problems and helps it last longer.
You need the right tools to put in a limit switch safely. Get all your tools ready before you begin:
Screwdrivers (flathead and Phillips)
Wire strippers
Needle-nose pliers
Multimeter
Drill and drill bits (if you need to make holes)
Measuring tape
Marker or pencil
Tip: A multimeter helps you find live wires and check your work.
Pick materials that fit what the maker says to use. Good materials help your limit switch last longer and work better. Here is a table that shows common materials and what they do:
Material Type | Description |
|---|---|
Polyphenylenesulfide (PPS) | This is a plastic that can handle heat and does not soak up much water. |
Aluminum (die-cast) (ADC) | Used for switch boxes, it is strong and lasts a long time. |
Zinc (die-cast) (ZDC) | Good for thin parts and does not rust easily. |
Nitrile-butadiene rubber (NBR) | Great at stopping oil and works in very hot or cold places. |
Silicon rubber (SIR) | Can handle very hot and very cold temperatures. |
Fluorine rubber (FRM) | Even better at handling heat, cold, and oil than NBR and SIR. |
Chloroprene rubber (CR) | Stands up to weather and ozone, used in many switches. |
You might also need screws, wire connectors, and electrical tape.
Always keep yourself safe when working with electricity. Wear the right safety gear to help stop injuries. Here is a table of safety gear and why you need it:
Safety Gear | Purpose |
|---|---|
Arc-rated clothing | Keeps you safe from heat and burns |
Non-conductive gloves | Helps stop electric shocks |
Safety glasses | Protects your eyes from flying bits |
Hard hats | Keeps your head safe from falling things |
Safety shoes | Protects your feet and helps you stand firm |
Insulating gloves | Stops electric shocks |
Face shields | Protects your face from sparks and arcs |
Flame-resistant clothing | Lowers the chance of burns from fire |
Dielectric footwear | Stops electricity from reaching your feet |
Note: Always wear your safety gear, even for small jobs. Safety is the most important thing.
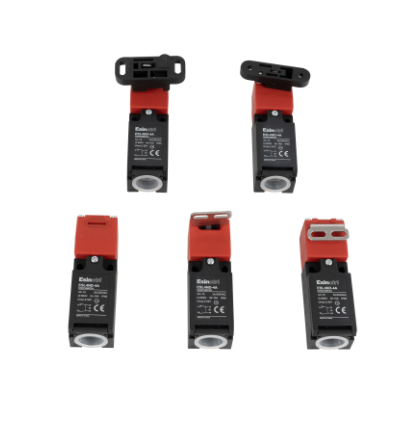
Picking the right limit switch keeps your project safe. You should choose switches from trusted companies. These companies make switches that last longer. Clion Electric is one company that cares about quality and new ideas. They also care about the environment. Their switches work well even in tough places.
Limit switches come in many kinds. Each kind works for a special job. Here is a table that shows some common types, how they work, and where you use them:
Type | Description | Typical Use Case |
|---|---|---|
Plunger actuated | Uses a push button or plunger to activate | Simple on-off position detection |
Roller lever actuated | Has a roller at the end of a lever | Adjustable for moving parts |
Rod lever actuated | Uses a rod or lever pushed by an object | Heavy-duty applications |
Cable pull | Activated by pulling a cable | Perimeter guarding, large areas |
Rotary actuated | Uses a rotating cam or wheel | Rotational movement detection |
Whisker actuated | Thin wire detects objects | Automation and robotics |
Magnetic | Senses magnetic fields | Dusty or harsh environments |
Inductive | Detects metal objects with electromagnetic field | High-speed, dusty, or wet areas |
Capacitive | Senses both metal and non-metal objects | Detects through barriers |
Optical | Uses a light beam to detect objects | Fast actuation, any material |
Pick the type that matches your machine and how it moves.
You need to make sure the limit switch fits your job. Check these things before you buy:
The switch must work with your system’s voltage and current.
Make sure you can mount and connect the switch easily.
Safety certifications like UL, CE, or IEC are important.
Buy switches from companies people trust.
Some jobs need LED lights or adjustable sensitivity.
Price matters, but do not pick low quality to save money.
Think about where you will use the switch. Some switches work better in heat, cold, wet, or dusty places.
Pick the right contact type, like normally open (NO) or normally closed (NC).
Choose the actuator type that fits your needs, like plunger, roller, or cable pull.
Tip: Always look for certifications like ISO 9001, UL, or CE. These show the switch is safe and high quality.
You can trust Clion Electric because they have strong certifications. They also care about making switches in a way that helps the planet. Their switches work well and last a long time.
You need to pick the right spot for your limit switch. The location affects how well the switch works and how long it lasts. Here are some important points to help you choose the best place:
Look at the environment. Make sure the switch stays safe from dust, water, and heat.
Keep the switch away from places where normal movements could trigger it by accident.
Avoid spots with strong vibrations or shocks. These can cause false signals.
Make sure nothing blocks the switch. The moving part must touch the actuator every time.
Choose a spot that is easy to reach for maintenance or inspection.
Check that the switch fits with the machine’s design. Some machines need special mounting brackets.
Tip: If you mount the switch in a hard-to-reach spot, you may have trouble fixing or checking it later.
The way you set the switch matters. Orientation affects how the switch responds and how reliable it is. You can see the differences in the table below:
Orientation | Impact on Performance and Reliability |
|---|---|
Horizontal | Works well when you have little vertical space. The direction of actuation may change. |
Vertical | Most common. Gravity helps the actuator move. Reliable for many jobs. |
Angled | Gives you more options for mounting. Needs careful adjustment to keep contacts stable. |
You should avoid setting the full stroke too close to the operating point. This can make the contacts unstable. Vibration or shock can also cause problems if you do not set the orientation right. Adjust the stroke with the mounting panel or the actuator dog to prevent damage.
Always check that the actuator lines up with the moving part.
Make sure the switch does not wobble or shift after you install it.
If you use an angled mount, test the switch several times to make sure it works every time.
You need to follow clear steps to mount your limit switch. Secure mounting keeps your machine safe and helps the switch last longer. Here is a step-by-step guide:
Determine the Installation Location
Find the spot where you want to detect movement. Mark the area with a pencil or marker.
Choose the Appropriate Installation Method
Pick a mounting method that fits your machine. Use brackets, screws, or clamps as needed.
Align the Moving Parts
Make sure the actuator touches the moving part at the right time. Check the alignment from different angles.
Secure the Switch
Fasten the switch tightly. Use the right screws and make sure the switch does not move or shake.
Wiring
Connect the wires according to the instructions. Keep wires away from high-voltage sources. Use wire connectors and electrical tape for safety.
Test the Limit Switch
Move the actuator by hand. Listen for a click or check with a multimeter. Make sure the switch works before you power up the machine.
Safety Check
Inspect all parts. Make sure the switch is secure and nothing blocks the actuator. Check that the environment suits the switch.
Note: Poor installation can cause dangerous situations. Misalignment or loose mounting may lead to switch failure, machine errors, or safety hazards. You may face higher maintenance costs and more downtime if you do not secure the switch properly.
You should inspect the switch regularly. Look for loose screws, worn actuators, or damaged wires. Good maintenance helps prevent failures and keeps your machine running smoothly.
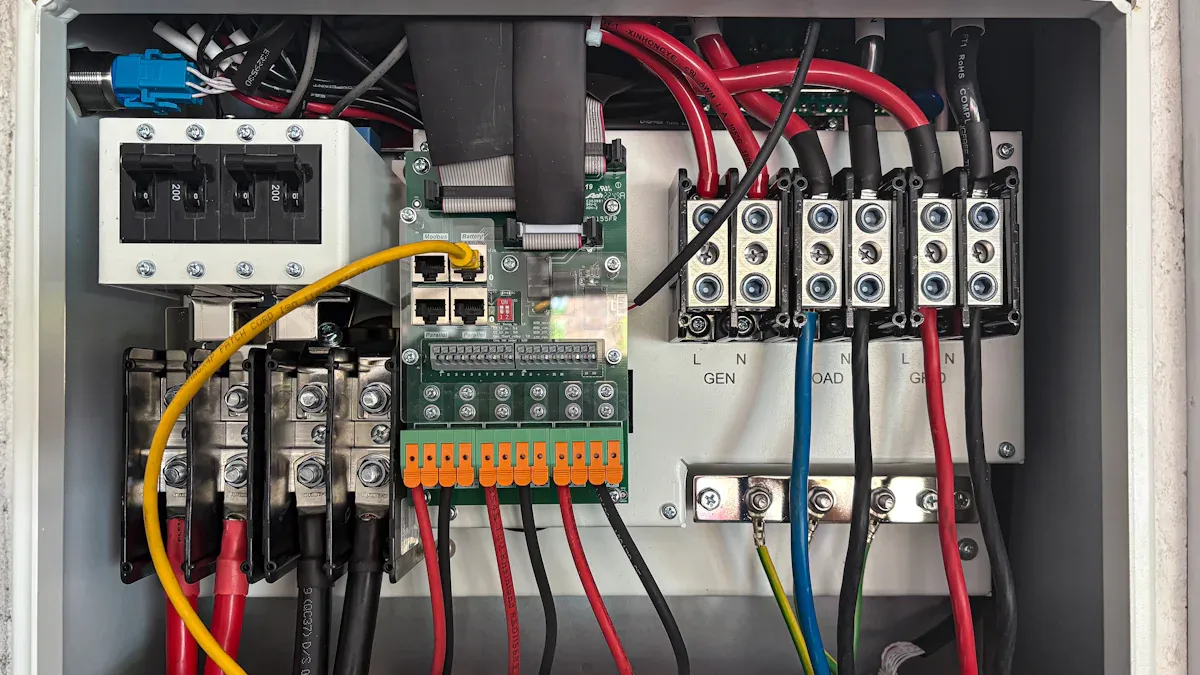
Wiring a limit switch is very important for safety. You must use the right cables and connectors. If you wire it wrong, your machine may not work. It could also become unsafe. Follow these steps to connect your limit switch the right way.
A wiring diagram helps you see where each wire goes. Always look at the diagram before you start. Most limit switches have three terminals: Common (C), Normally Open (NO), and Normally Closed (NC). You usually only need two wires for control. The diagram below shows a simple way to wire a limit switch:
+---------------------+
|   Limit Switch      |
|  +---+---+---+      |
|  | C | NO| NC|      |
|  +---+---+---+      |
+---------------------+
      |   |   |
      |   |   |
     VDC  |   |
         LOAD |
              |
            GND
Connect the Common (C) terminal to the positive voltage (VDC).
Connect either the NO or NC terminal to your load or control input.
Leave the terminal you do not use unconnected.
Tip: Always check the wiring diagram for your switch model. Some switches have different names or layouts for the terminals.
You should follow clear steps to wire your limit switch. This helps you avoid mistakes and keeps things safe. Use the table below to help you with each step:
Step | Description |
|---|---|
1 | Check the circuit with the drawing to make sure the wiring and colors are right. |
2 | Use a multimeter to check if the limit switch is on or off. |
3 | Test the switch without power to see if it works. |
4 | Use good wiring methods, like cutting wires to the right length and using insulation. |
5 | Use grounding and anti-interference steps with the right wiring rules. |
Here is an easy way to connect your wires:
Turn off the power before you start. This keeps you safe from shock.
Strip the ends of the wires to the right length. Make sure the wires are clean and not broken.
Put each wire into the correct terminal. Tighten the screws with a screwdriver.
Use wire connectors or terminal blocks to keep wires secure.
Keep cables away from high-voltage lines. This stops interference.
Add strain relief to cables. This keeps wires from pulling out.
If your switch has three contacts, use only two for control. Connect Common (C) and either NO or NC, depending on what you need.
Use electrical tape or cable ties to hold all connections tight.
If your system needs more safety, add a fuse or circuit breaker.
Note: When you wire limit switches in series, it is important for Normally Closed (NC) switches. Mixing series and parallel can cause problems. Always connect Common (C) to positive voltage (VDC) for the switch to work right.
Safety is the most important thing when wiring a limit switch. You need to follow good safety rules to stay safe. Here are some tips to help you:
Turn off the power before you start to avoid shock.
Pick switches with the right IP rating for your area.
Make sure the voltage and current match your system.
Use mechanical stops so the actuator does not get pushed too hard.
Do not use the switch to break high-power loads. Use relays or PLC inputs for that.
Route cables with strain relief and shielding if needed.
Use shielded cables in noisy places to stop signal problems.
Ground the shield at one end to lower electromagnetic interference.
Do not put signal cables next to high-voltage lines.
Make all connections tight. Loose wires can cause sparks or failures.
Add a fuse or circuit breaker for extra safety.
Evidence | Description |
|---|---|
Positive Acting Components | Safety jobs need parts that separate contacts. This keeps you safe. |
Failure Modes of Limit Switches | Whisker switches are not safe. They can fail in many ways. |
Evaluation of Hazards | You must look for all dangers, even if parts fail. |
Tip: Always use a multimeter to check your work before turning on the power. This helps you find mistakes early.
If you follow these steps and tips, you will wire your limit switch safely and correctly. Good wiring helps your machine work well and keeps you safe.
After you install and wire your limit switch, you need to adjust and test it. This step makes sure your switch works the right way and keeps your machine safe. Testing helps you find problems before they cause trouble.
You must set the actuation points so the switch responds at the right time. Follow these steps for precise operation:
Set the Retracted Position
Do not install the actuator in your machine yet.
Move the actuator toward the retracted position until the limit switch nut trips the switch.
Turn the translating tube by hand. Make sure the distance between the housing clevis hole and the translating tube clevis hole matches your desired closed height.
Install the actuator in your machine. Check for any drift and adjust if needed.
Set the Extended Position
Hold the translating tube so it does not rotate.
Move the actuator toward the extended position until you reach the desired height.
Adjust the limit switch nut until it activates the switch.
Check for drift again and readjust if needed.
Tip: Take your time with these steps. Careful adjustment helps your switch work every time.
You need to calibrate the switch for accurate and repeatable results. Use this process:
Move the control valve to its fully open and closed positions.
Adjust the cams or screws on the switch until they touch the contacts at the right points.
Apply a known input signal. Measure the output and compare it to what you expect.
If the output is not correct, adjust the switch again.
Note: Calibration helps your switch respond the same way every time.
Testing checks if your switch works under real conditions. Use this checklist:
Test the switch’s function during normal operation.
Use a multimeter to check all electrical connections.
Adjust the activation point if you find any problems.
Inspect the mounting and wiring for stability.
Simulate fault scenarios to see how the switch responds.
Write down your installation and test results for future reference.
Common issues include switches that stay triggered or do not reset. Sometimes, LED indicators stay on until you trigger the switch. If you find problems, check your wiring and connections. You may need to add resistors or replace faulty parts.
Following a step-by-step guide or video can help you get the best results. Always test your work before using the machine.
You can put in and connect a limit switch by doing each step one at a time. First, pick the right switch for your job. Next, make sure you mount it tightly so it does not move. Then, wire it with care and check if it works right. Always look at your connections again to be sure they are tight. Use tools made for electrical work. Check for any loose wires or broken parts. If something goes wrong, try these steps:
Look at the filters and change them if they are dirty.
Wipe off the temperature sensor to keep it clean.
Use a multimeter to see if the circuit is working.
Turn off the power and restart the system.
Pick switches made from materials that do not rust. Make sure they have the right IP rating for your area. Check your system often and get help from good support teams. This will help your system work well for a long time.
You can use a multimeter to test it. Move the actuator and watch the numbers. If you hear a click and see the numbers change, your limit switch works.
Check the wires and connections first. Make sure the actuator touches the switch. Clean off any dust or dirt. Change any broken wires or switches.
Yes, you can connect limit switches in series or parallel. Series wiring is good for safety circuits. Parallel wiring lets you control more devices. Always use the wiring diagram.
Certified limit switches follow safety and quality rules. They work well and last longer. Look for UL, CE, or ISO marks before you buy.
Check your limit switch every month. Look for loose screws, worn actuators, and broken wires. Regular checks help stop problems and keep things safe.

 注: 建议图片大小150px*50px


